Push notifications are the best way to fascinate the audience towards your iOS app. It’s like an alarm to convey your message to your user. Push notifications in ios are handled and authorized by APNs( Apple Push notification services).

In any organization, there may be hundreds or thousands of developers and testers, sometimes organizations could not afford to give iOS devices for each and every developer or tester. But iOS push notifications can only be sent on devices. Don’t worry bro, In iOS 13 / Xcode 11.4 Apple introduced some new features which are very beneficial for the user’s and developer’s perspective and sending push notifications on simulators is one of them.
We will go through each and every step one by one, we need a few primary kinds of stuff like Xcode 11.4 and Catalina OS or more than that version.
How to do Project setup and take permission from the user to receive the push notifications :
- Create a new project.
- Submit the required data such as project names like ‘PushNotifications‘.
- Import UserNotification framework in Appdelegate class.
‘import UserNotifications’
- Copy below code in Appdelegate to take authorization from the user to receive the push notification.
func registerForSendPushNotifications() {
            UNUserNotificationCenter.current()
                .requestAuthorization(options: [.alert, .sound, .badge]) {(granted, error) in
                    print("Push Notification Permission granted: \(granted)")
            }
    }
5. Call the same function from didFinishLaunchingWithOptions, which is the first function in Appdelegate.
func application(_ application: UIApplication, didFinishLaunchingWithOptions launchOptions: [UIApplication.LaunchOptionsKey: Any]?) -> Bool {
        // Override point for customization after application launch.
        registerForSendPushNotifications()
        return true
    }
6. Run the project on the simulator and just pause your running project. Now take a sip of water, your half of the work is done. Now we just have to collect some data which requires sending push notification on the simulator.
Let’s collect for more information to get notifications over simulator:
- Simulators Device Identifier
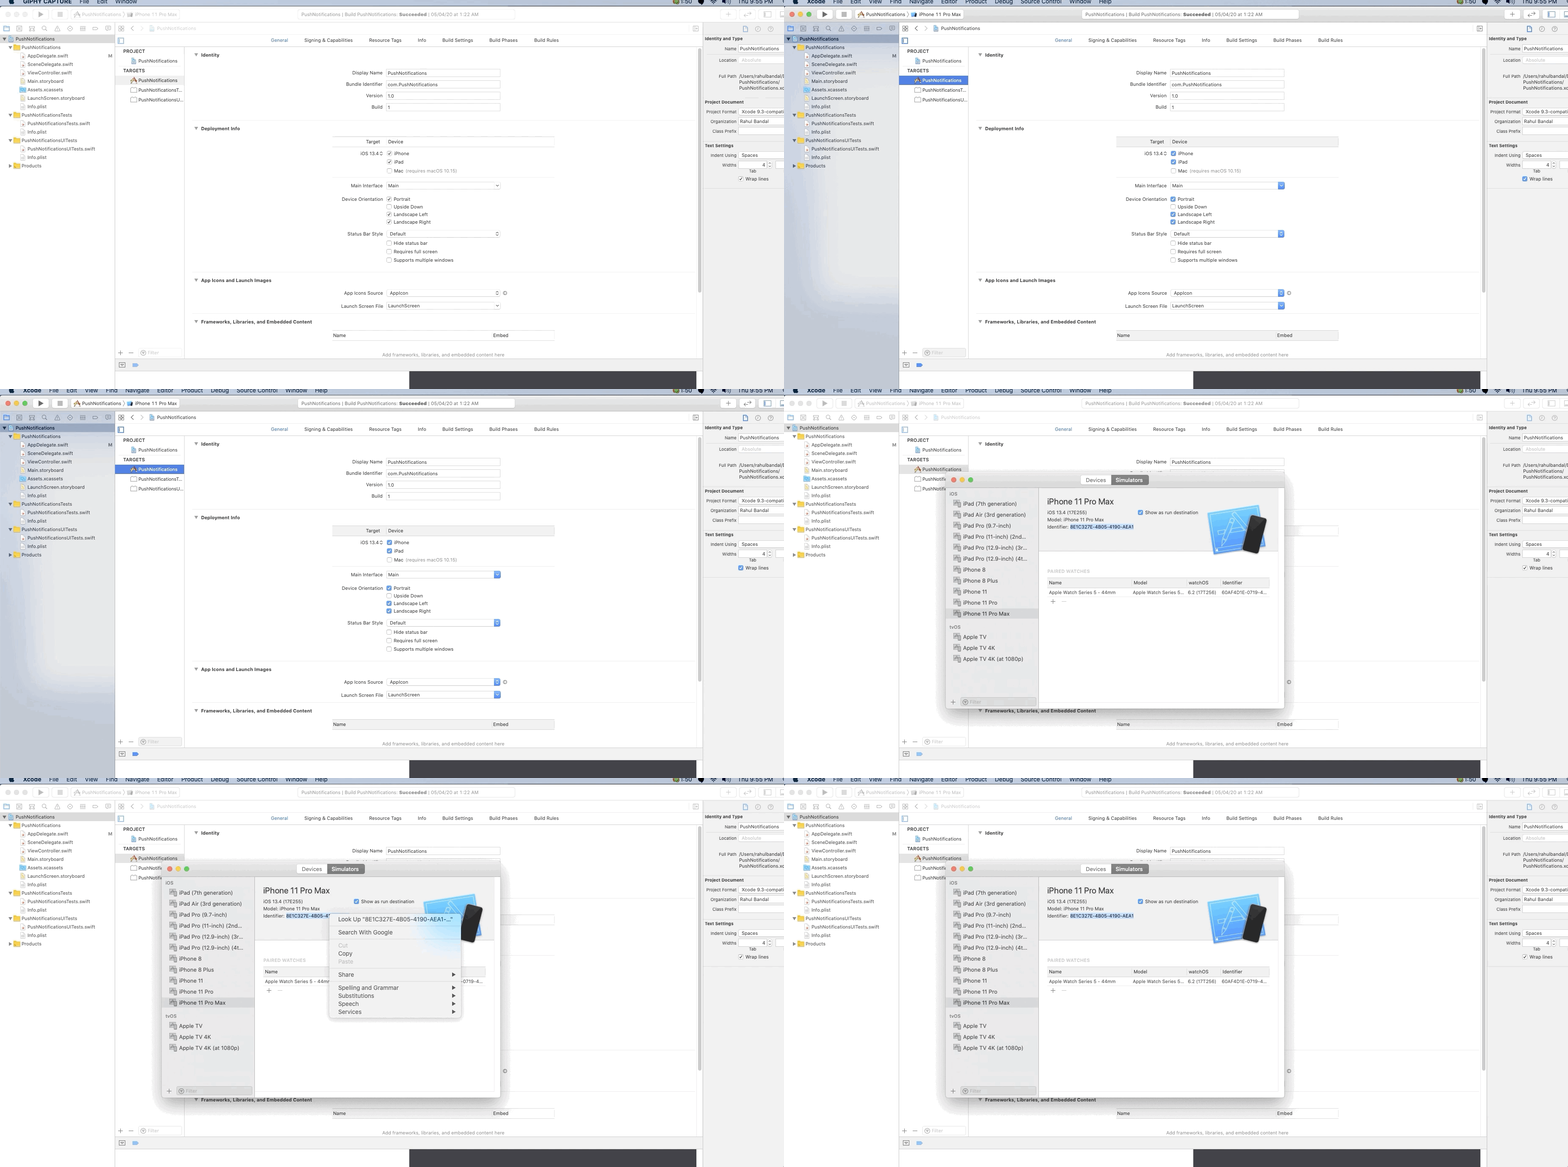
Select Window from the menu -> Devices and simulators -> Here you can see the whole list of physical devices and simulators -> Select Device and copy it. And save somewhere in the Notes/ TextEdit.

Example : 8E1C327E-4B05-4190-AEA1-0646E73A3A49
- Bundle Identifier :
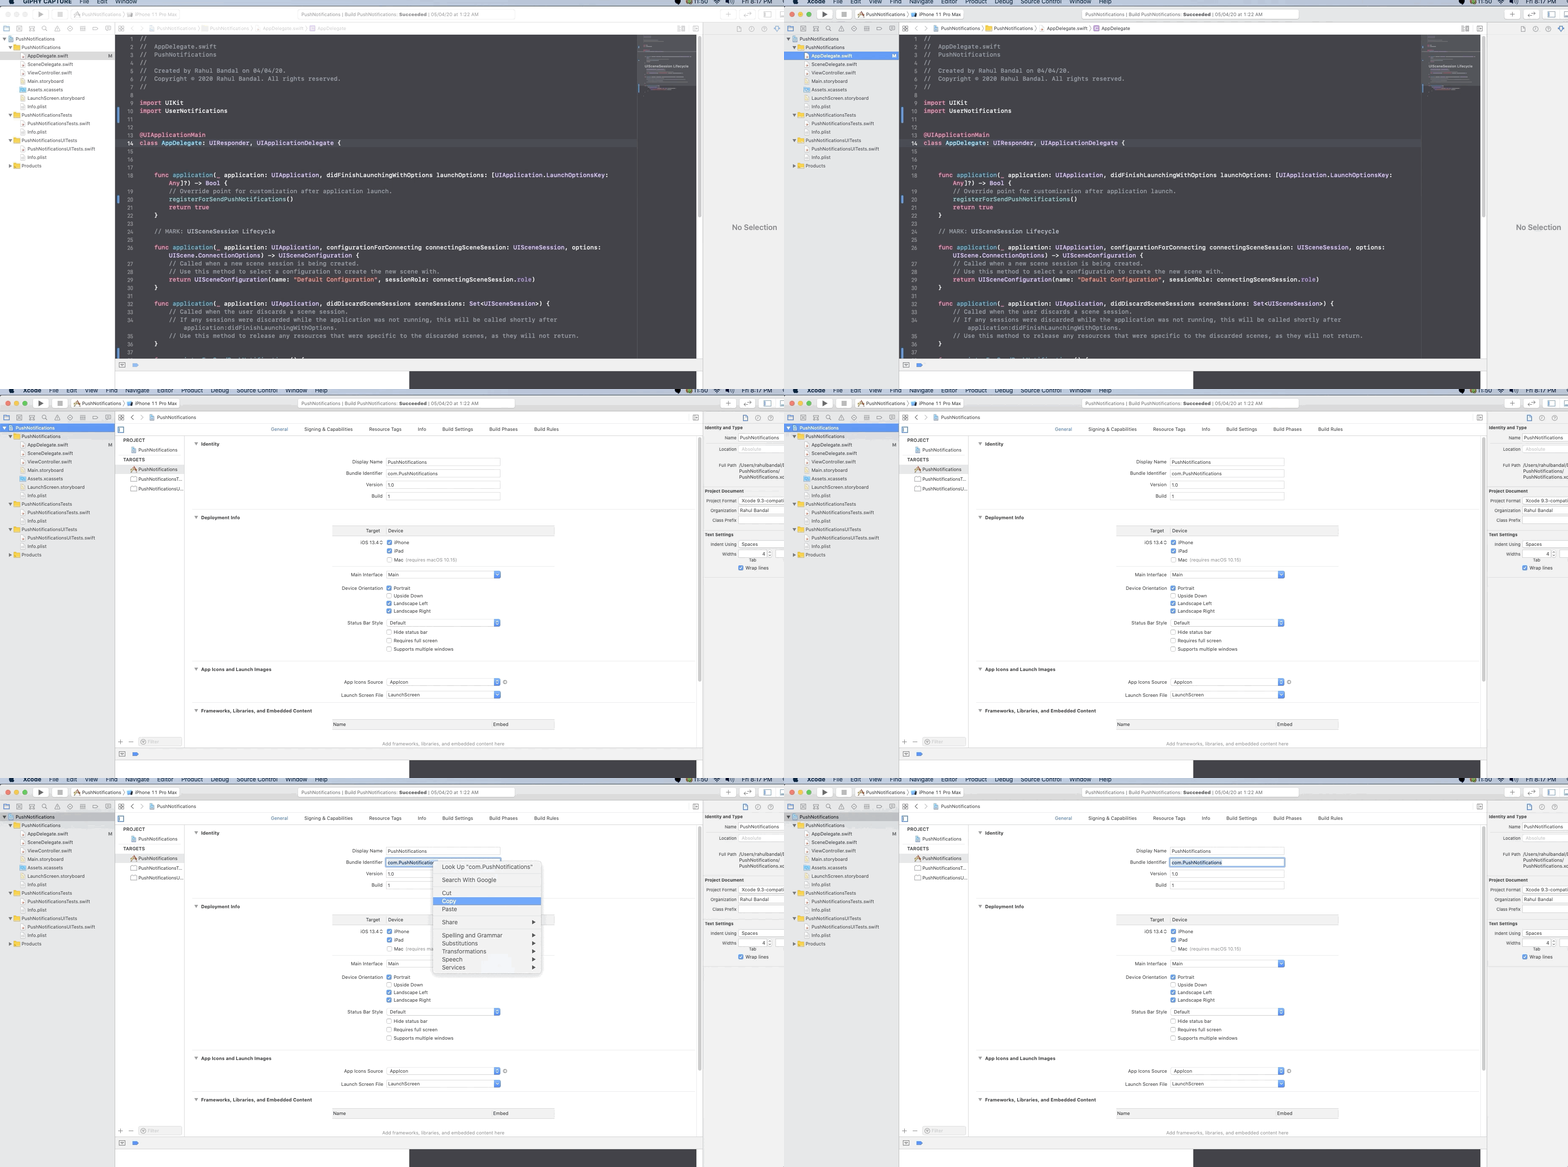
Select Project -> Tap General Tab -> Copy Bundle Identifier -> Paste somewhere in the Notes/TextEdit

Example: ‘com.PushNotifications’
- .APNs File :
We need a JSON payload. The payload contains custom data which include a basic alert, badge count or sound, you can also add your own key-values. I will give you the demo content of the payload file.
Note: Payload contents should not more than 4 kb (4096 bytes).
{
    "aps":{
        "alert":"Test drop",
        "sound":"default",
        "badge":3
    }
}
Copy this JSON new file change extension of this file ‘.apns’ and save it.
Now, here we have everything that needs to send push notification on the simulator. Follow the given steps to send notifications.
- Open terminal.
- Enter into the folder where you saved ‘.apns’ file. Like ‘cd Document’.
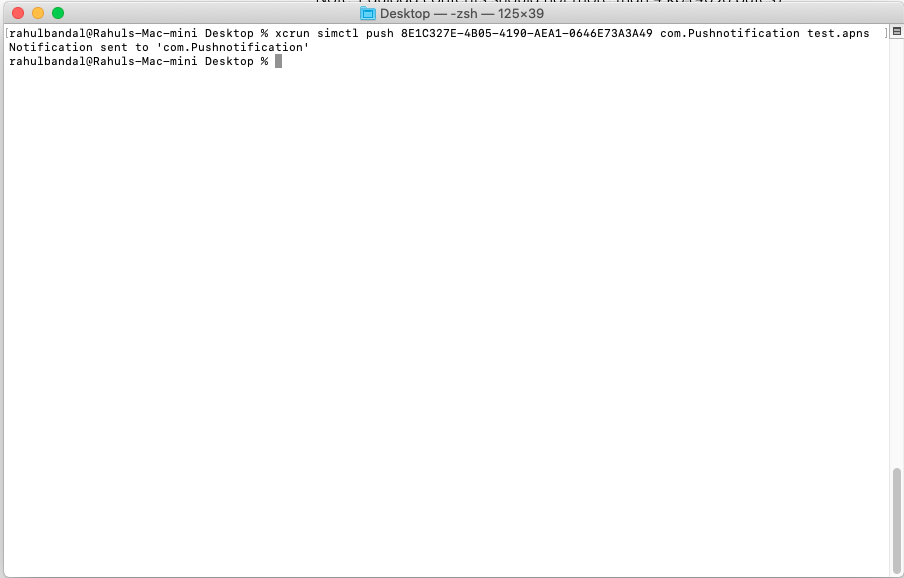
- Enter this command.
xcrun simctl push <Device Identifier> <Bundle Identifier> <.apns file name>
Example:
xcrun simctl push 8E1C327E-4B05-4190-AEA1-0646E73A3A49 com.Pushnotification test.apns
Result : Notification sent to ‘com.Pushnotification’

If you receive this message in the console: “Notification sent to com.PushNotification” Congratulations, You got push notifications on your simulator.
If you face any difficulty during implementation, please comment below or you can email me: blogswithrahul@gmail.com
Conclusion:
Apple did a great job, No need to create development certificates and provisional profiles. No need to depend on API developer. Build push notification functionality and move further. Once everything gets configured, you can move it on production.